Invalid Domain
You are here :
|
Windows XP Dial-up Configuration
These instructions are written assuming you are using Windows XP. If you are using a different version of Windows, please contact us for further information.
Once you have connected everything up, you need to configure Windows for a new dialup connection. To to do this, click on the Start button and select the Settings -> Control Panel option. This will open the standard Windows control panel from where you can configure your computer. 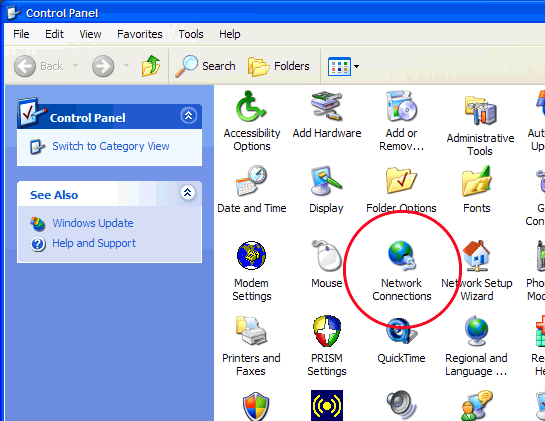 Fig.1 - Windows Control Panel Step 1. 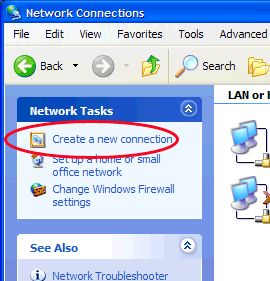 Fig.2 - Create a new connection This will open the new connection wizard from which you can go through answering the various questions and providing the Orpheus account details provided to you on the letter you received when you first subscribed. If you have lost your account information, please contact support. 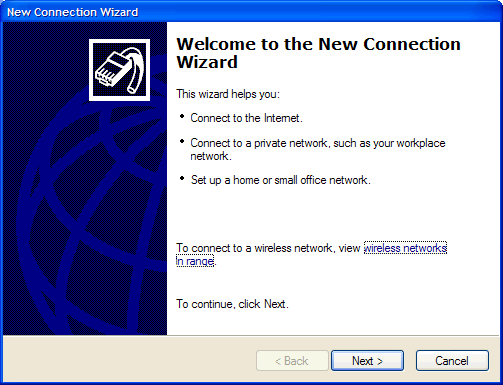 Fig.3 - New Connection Wizard step 1 Step 2. 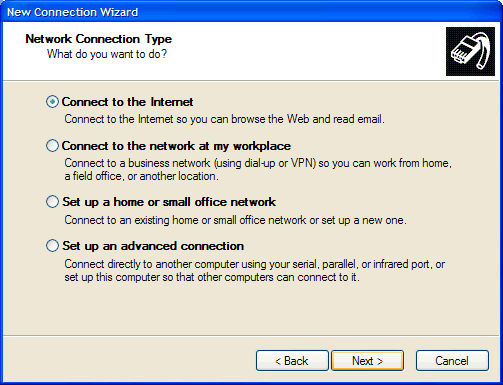 Fig.4 - New Connection Wizard step 2 You want a straight-forward connection to the internet, so ensure that the first option is selected (ticked) and then click Next to go on to step 3. Step 3. 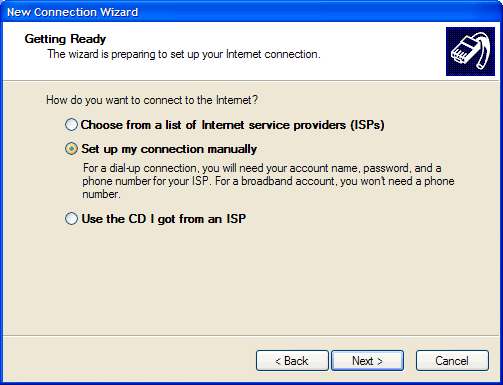 Fig.5 - New Connection Wizard step 3 To configure the computer for Orpheus, you want to setup a connection manually, so select the Set up my connection manually option on the connection wizard screen 3. Click Next to continue. Step 4. 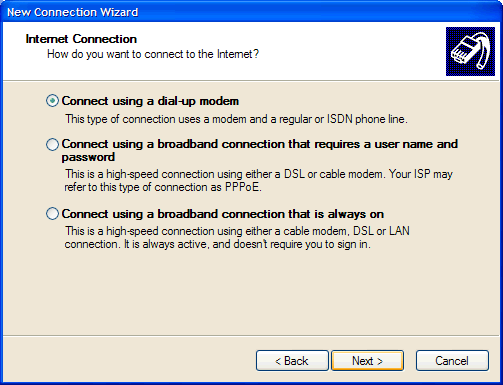 Fig.6 - New Connection Wizard step 4 As you're using a dialup modem, make sure the Connect using a dial-up modem is selected and then click Next again. Step 5. 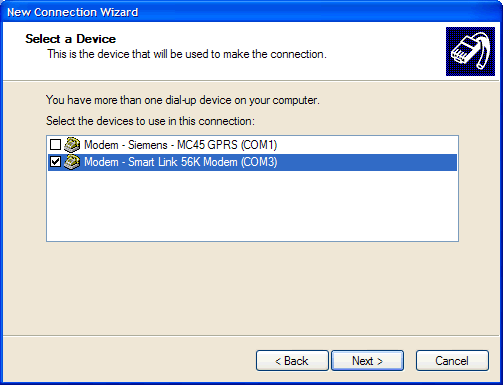 Fig.6 - New Connection Wizard step 5 The modem you're using should appear in the list of options. This may vary depending upon your computer hardware. In the example screenshot here, we have two modems in the computer, so we've selected the standard 56K modem on COM port 3. Ensure that the correct modem is ticked and then click on Next. Step 6. 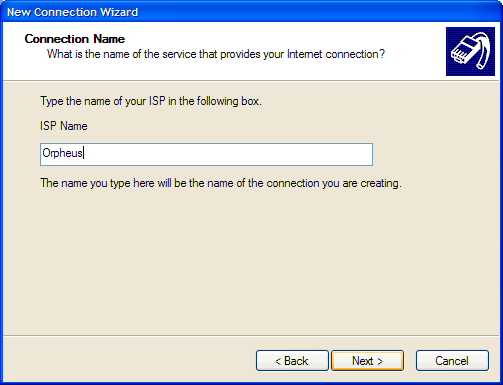 Fig.7 - New Connection Wizard step 6 The computer is now asking you the name of your ISP. Enter Orpheus here. This is the name that this connection will be known as once you've completed the setup. In future, to go online you simply select the 'Orpheus' connection when prompted. Once you've entered the name, click Next to continue. Step 7. 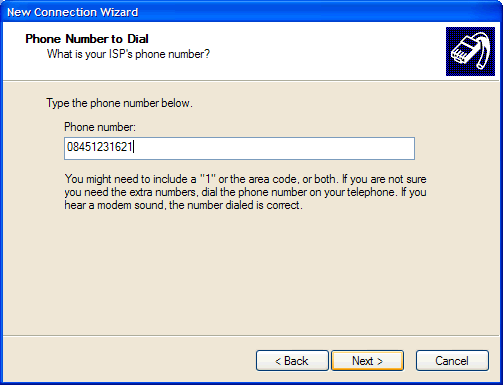 Fig.8 - New Connection Wizard step 7 You should now enter the phone number for Orpheus. This is 0845 123 1621. You should enter it as one continuous number with no spaces or other characters in it (see fig.8). When you have entered the phone number, click Next to continue. Step 8. 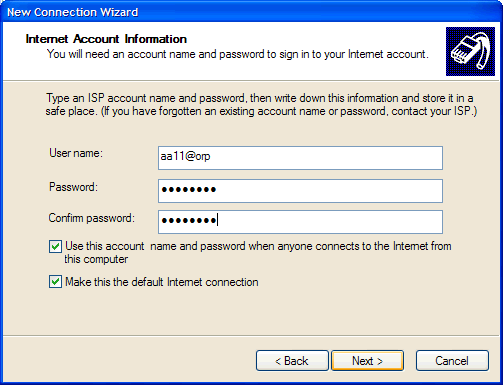 Fig.9 - New Connection Wizard step 8 You should now enter your dialup (RADIUS) username and password, as provided to you on the sheet of paper you received when you initially subscribed to Orpheus. For confirmation, enter the password twice, with both copies matching. The password will appear as asterisks so that anyone looking over your shoulder can't see what you're entering - but it's case sensitive so make sure you haven't accidentally got the caps lock key turned on. Make sure the Make this the default internet connection option is ticked, which means that the computer will automatically connect to Orpheus when you want to go online in the future. Click Next to continue. Step 9. 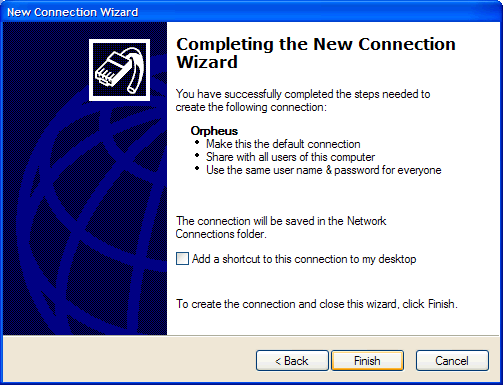 Fig.10 - New Connection Wizard step 9 Your new account is now setup and ready to use. It's up to you whether you want the computer to add a shortcut on your desktop. If you require this, simply tick the relevant box. Click Finish to complete the setup process. Your Orpheus dial-up connection is now ready to use. Step 10. 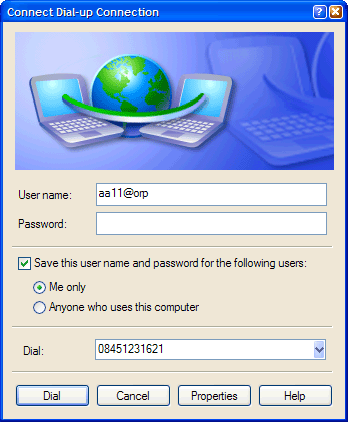 Fig.11 - Dialling into Orpheus for the first time You can now connect to the internet using your new Orpheus dial-up connection. Whenever the computer connects to the internet you will be presented with the window shown in fig.11. You shouldn't need to change any of the settings, so to make the connection simply click on Dial. Assuming the computer is plugged into the phone line and no one is using the phone, the computer will attempt to dial into Orpheus. This process can take up to about 30 seconds or so, depending on the speed of your modem and the local exchange. If you have a speaker on your modem you may hear the computer dialling the number, followed by some 'fax machine' noises at the other end as it negotiates a connection. If all is well, the computer will authenticate (enter your username and password) and then say it's online. You can now use the internet, either by loading Internet Explorer or Firefox to browse the world wide web, or by loading your email software such as Outlook in order to download your emails. If you want to configure your email, return to the main Windows support page. |
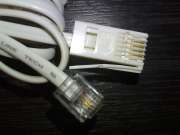 To connect your PC to an Orpheus dialup connection you require your computer, a modem (most modern computers have one built-in) and a phone lead which connects the computer to your telephone socket.