Invalid Domain
You are here :
Configuring Thunderbird for EmailThunderbird is an email client designed and written by Mozilla - the people who developed the Firefox web browser. It represents much better security and ease of use than Outlook Express, so is worth switching to Thunderbird, even though you have to download and install it rather than use Outlook Express, supplied free with Windows. Thunderbird can be downloaded for free from www.mozilla.com/en-US/thunderbird/ Once you have downloaded and installed Thunderbird, follow these simple instructions for configuring it for Orpheus email. Step 1 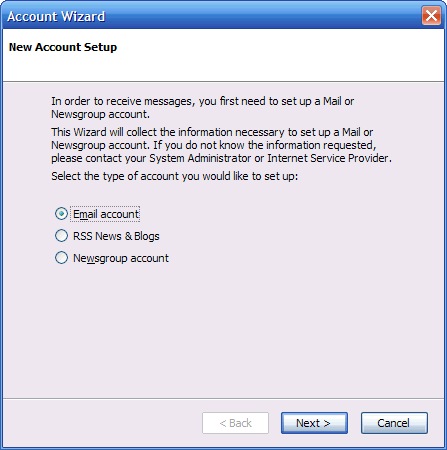 Fig.1 - Creating a new account Step 2 - Setting your identity 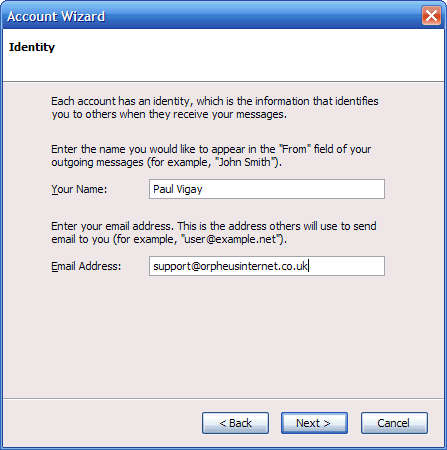 Fig.2 - Setting your Identity Step 3 - Server Information N.B. A recommendation is to untick the Use Global Inbox option which will ensure that this email account has it's own top-level inbox, which is useful if you're planning to add further email accounts. 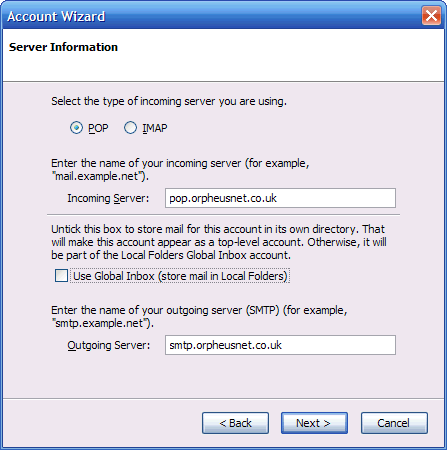 Fig.3 - Server Information Step 4 - User Names Orpheus don't require a username for outgoing mail, so ensure the Outgoing User Name is blank. Click on Next > to continue. 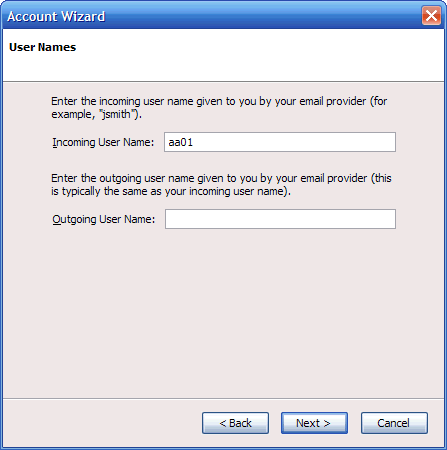 Fig.4 - User Names Step 5 - Account Name Click on Next > to continue. 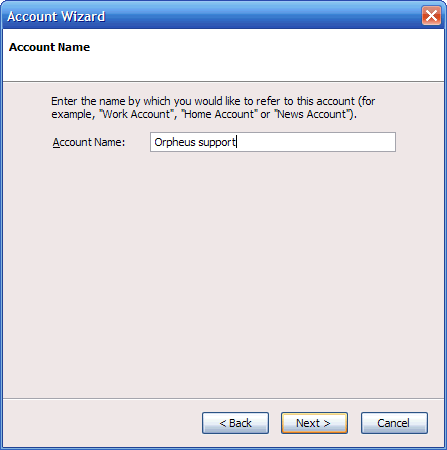 Fig.5 - Account Name Step 6 - Finished! 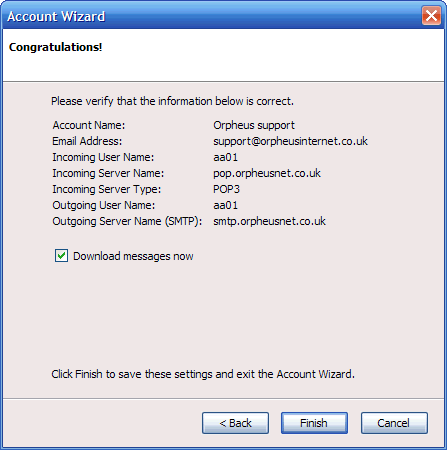 Fig.6 - Finished! Checking EmailThe first time you fetch email for a new account, Thunderbird will ask you to enter the password for the relevant account (fig.7). Enter your POP email password and tick the box if you want the computer to save your password for future reference (which will save you having to remember it and enter it each time you check mail for this account. Click OK to continue and start fetching mail for this account. 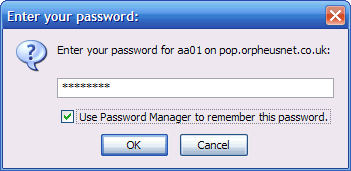 Fig.7 - Entering your password Your account should now be setup and working. Thunderbird will display a window containing any new email messages for you, and a sidebar containing the various mail folders for your newly created account. See fig.8 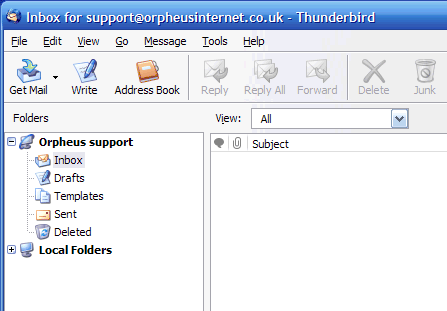 Fig.8 - Main Thunderbird display |